
How to Prototype an AI feature (Part 1)
The best way to learn how AI features are actually built is to try one your self

Many Product Managers I talk to feel anxious about the rapid rise of AI. They want to get up to speed on how to build AI products but may not have the opportunities yet at work or know where to begin.
It’s true building AI products is complex and it helps to understand the tech behind it. However, the best way to learn is to simply start small by building a very simple AI prototype.
This guide will walk you through it. This flow allows any PM to go from a simple idea to a prototype of an AI powered feature with no coding to understand the basics of how AI features work.
Step 1: Define Your Idea & Capabilities
Start with a concise definition of the problem you’re solving or the opportunity you’re seizing. Then, map out your desired input, output, and core capabilities.

💡 Pro-Tip: Before building, test the concept in a general chat application like Gemini or ChatGPT. Ask yourself: What is the out-of-the-box user experience? How could it be improved? Focus on potential UI/UX changes, the required tone, how the response is structured, or how to make it a convenient, dedicated flow.
Step 2: Pick Your Prototyping Tool
The easiest way to make quick, functional prototypes of AI-powered features is by using platforms designed for prompt engineering and rapid deployment. Tools like Google’s AI Studio (using the Gemini API), Anthropic Artifacts, or Lovable which has a cloud/AI integration are all good options.
For this example, we’ll use Google AI Studio because it offers a free tier for testing and integrates well with other Google tools.
Step 3: Engineer Your Prompt
Instead of writing a complex, perfect prompt from scratch, leverage the power of the AI itself.
Go to Gemini (or your preferred general AI chat application) and say:
“Make a good system prompt for Google AI Studio from this brief of what I want to build: [insert table details from Step 1]”
Step 4: Build it
Take the detailed prompt generated in Step 3 and copy/paste it into the prompt engineering interface of your chosen tool. If you are using Google AI studio, tap “Vibe code GenAI apps” to get started.
Once you enter the prompt, the AI tool will write the code and produce a visual and interactive prototype of your experience. As an example, check out my prototype: https://aistudio.google.com/app/apps/drive/1IEjjG2J0vVRk6ApKuS5EF5rW5MpJPq_q
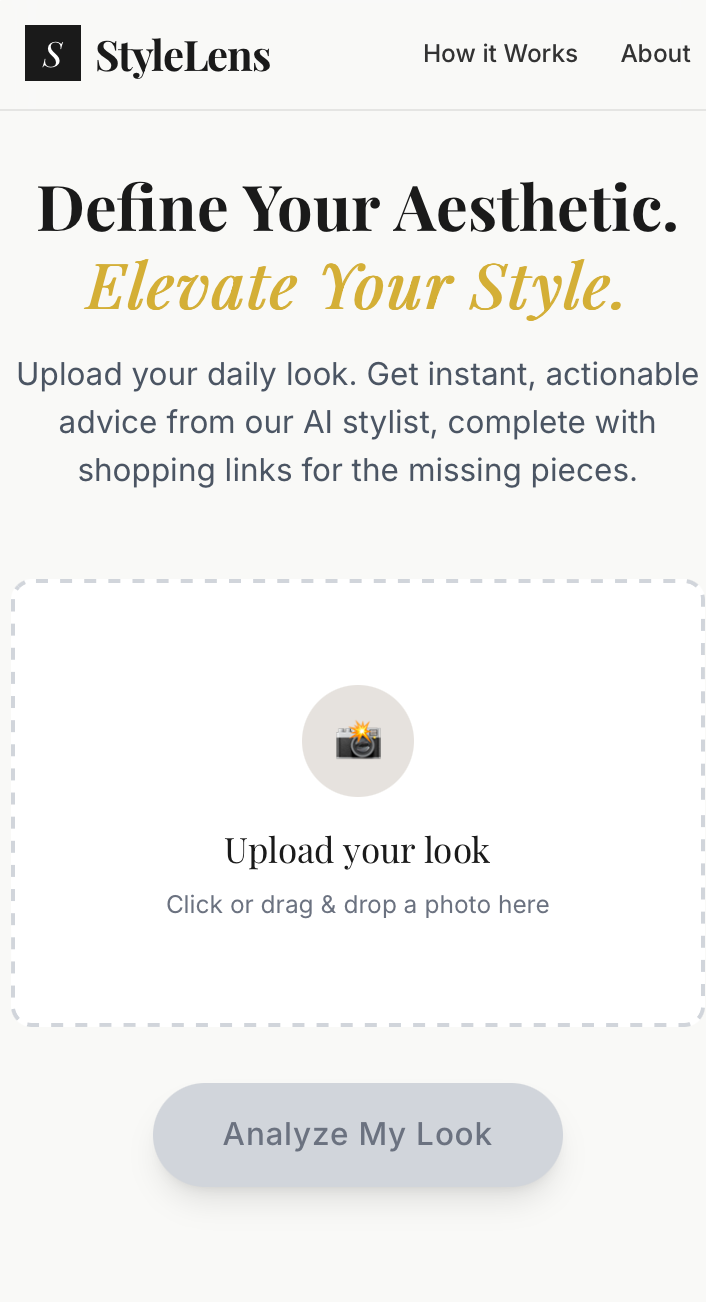
Step 5: Test it
Now, test it out. You will likely find that you need to tweak the prompt several times to get a “good” feeling response. For example, on my first pass it had 5 cards all vertically stacked to explain the style, outfit suggestions, and shop the look. I went through a few iterations to make a more condensed via that was easier to process.
If you have heard about “evals” (evaluation), this is the very beginnings of that process. Test your product with different scenarios or share with some friends, note down the common issues, and then iterate to update your prompts to improve it.
Understanding What You Built
The beauty of this simple prototype process is that it allows you to learn about the underlying mechanics.
You can ask whatever tool you are using to explain the system. For example, I prompted in Google AI studio: “I want to learn about how the product works. What system prompt and tool calls are you making and why? Explain them in simple terms for a non-engineer.”
In this case, it detailed for me how the app is working under the hood. It explained how it set the role and goal of “world-class stylist” to influence the tone and perspective of the output and uses tools to get google search data, store and format the results
While AI products are complex to build at scale, this prototyping process helps you get started with the basics. You don’t need to have a marketable app idea or coding background to try this out and start learning.
Try this approach out yourself and let me know how it goes. Just take the first step and build your first AI app or feature to start moving from AI anxiety to AI fluency.
In the next Part 2 post, I’ll dive a bit more into the “evals” process and how you can learn the very basics of AI powered feature evaluation using a simple app like this.
This is an excellent methodology for creating a prototype because it starts with clearly structured requirements (ideas and capabilities) and then asks the LLM to generate a system prompt. This approach is cleaner and more structured than starting with a user prompt.
Eagerly awaiting evals!!!!!!